


UTCustom CXS Ackerman Compensators
Published on 04/01/2024
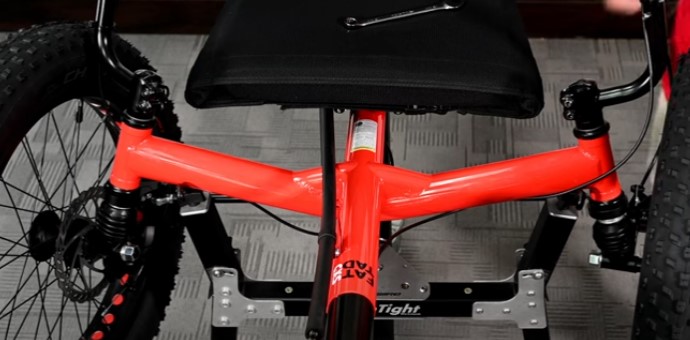
Hello everyone, welcome back to another Utah Trikes articles. Today we're going to show you how to install our UTCustom Ackerman Compensators for CXS Suspension. These arms are used to change the mounting location of your tie rods to above the suspension in order to prevent the wheels from going out of alignment under suspension load. We also have a video linked at the bottom of this page. So let’s get started!
PART 1: Disassembly of CXS Suspension
1. Remove the front wheel
2. Uninstall the tie rod
3. Unbolt the headset and remove the spindle
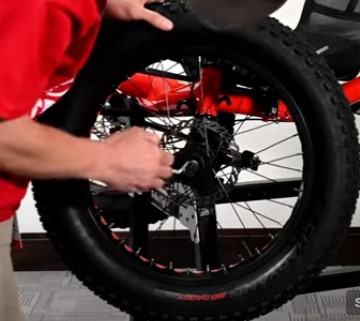
First step is going to be removing the front wheel. If you need help with this step, check out our Sunseeker wheel tutorial linked here.
Next is to remove the tie rod end. With the wheel removed, this process should be easier. Just unscrew the nut holding the tie rod bolt to the suspension and move the tie rod out of the way for now.
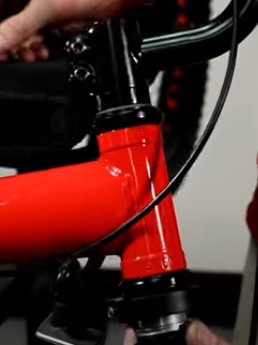
We will then loosen the bolts on the handle bar and begin to remove the bolt on the top of the headset. Once the bolt is removed, we will twist the handle bar off of the spindle to remove it. After removing the handlebar the spindle will be loose enough to slide out the bottom of the head tube.
Make sure when you remove the spindle that you keep track of the bearings. You will be able to reuse them. We usually recommend upgrading to the Revolution headset while the spindle is already out.
We will now remove the bottom race from the spindle. Now, with the spindle completely bare, we can begin installing the Ackerman Compensators.
PART 2: Installing the Ackerman Compensators
1. Clamp on the new arms
2. Reinstall bearings and spindle into head tube
3. Reinstall the handlebar, brake, tie rod, and wheel
4. Check wheel alignment
5. Tighten everything down
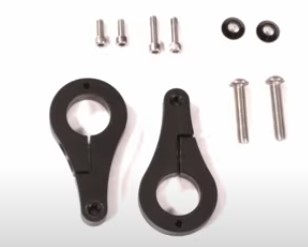
The UTCustom Ackerman Compensator Kit will come with a set of Ackerman arms, 2 M8 Button head bolts, a set of longer standard head M5 bolts, and a set of shorter standard head M5 bolts.
First, we will place the longer standard head bolt into the hole closest to where we will slide the spindle through. Then the shorter standard bolt will go into the other. Next we will slide the Ackerman arm onto the spindle, making sure the side with the bolts goes towards the inside of the trike. Then push it down as far as it can go. We will keep the arm loose for now.
Now we can put the bearing back onto the spindle. The order they should be in is first, the bottom race followed by a bearing. Then slide the spindle into the head tube. Next we’ll place another bearing, followed by the top race, then the dust cap to top it off.
Next we will place a spacer on top of the dust cap. The amount of spacers needed will be determined by your setup. Then we will slide on the handlebar. Once we have everything on, we can install the top cover and bolt and tighten them down.
Now that the spindle is reinstalled, we will repeat the process on the other side.
Once we are at the same point on both sides, we can install the tie rod. At this point we would recommend installing a new, shorter Eco Tad tie rod for better steering angle and performance, but you will be fine reinstalling your stock tie rod.
We will place the longer button head bolt from the kit through the tie rod end. Then place the cone-shaped washer on top of the tie rod end with the smaller side down. We can then screw the bolt through the bottom of the new Ackerman arm and screw the original nut onto the end of the bolt.
For the next part we will reinstall the wheels on the trike so that we can align it.
From there we will straighten the wheels to begin. We can then line up the hole of the new Ackerman arm with the mounting hole of the old arm. We are looking for the arms to be evenly angled towards the rear wheel. Then we can tighten them down.
After the arms are set, we can adjust the tow of the wheels using the tie rod. By spinning the rod, we can adjust the tow until the length between the front wheels is even when measuring the fronts and backs of the wheels.
Once the wheels are aligned, we can go back and make sure all of the bolts are tightened down and then we are good to go!
I hope this video has helped you install new Ackerman Compensators on your own Fat Tad CXS. Check out our other trike tutorials to help you further customize your trike.
As always, if you have any questions or concerns you can contact our support team through email or by phone and they will be happy to get back to you when they can. In the meantime, Relax. Spin Fast. Ride Trikes.