


How To Do Your Own Basic Trike Maintenance
Utah Trikes Media Team - Published on 03/11/2024
Hello Everyone, welcome back to another Utah Trikes article. Today we're going to show you how to properly service and maintain your trike. Depending on how much you ride, you may need to service your trike more frequently. We recommend doing this every riding season. We also have a video version of this article that you guys can check out linked at the bottom of this page.
PART 1: Tire & tube removal and Replacement
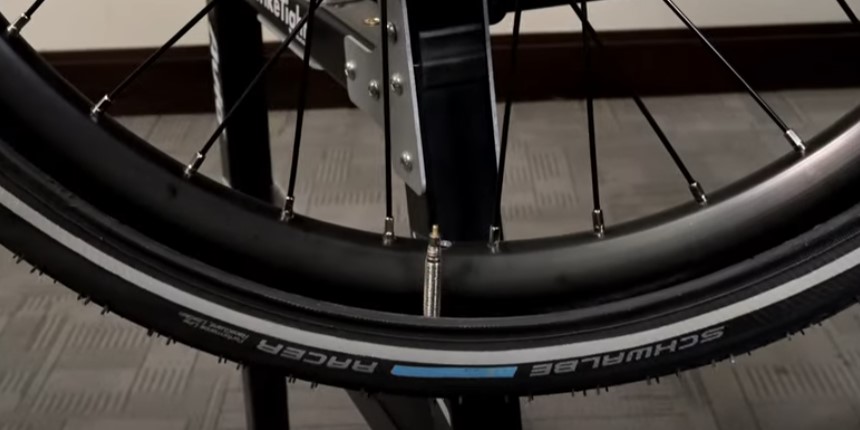
1. Remove valve cap
2. Empty the air from tire tube and remove valve ring
3. Remove tire bead with tire levers
4. Removes Tire
The first thing we will start with is inspecting and, if necessary, replacing the tube and tire. If you are inspecting your rear wheels, you will need to remove them from the trike.
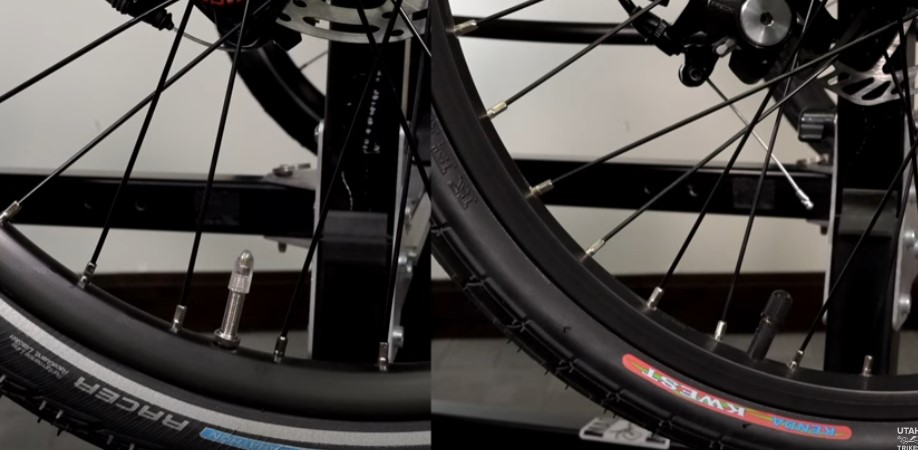
The first step in removing the tube and tire is to take off the valve cap and locking ring, then remove the air from the tube. Your tubes will generally come in either a presta or schrader valve style. On the presta style tubes you will need to unscrew the lock on the valve before opening the valve. To remove the air from the tube, simply press down on the valve to open it until the tire and tube fully deflate.
Once the tube has deflated, grab your tire levers and place both underneath the bead of the tire. The curved side of the lever should go under the bead and the flat edge should butt up against the wheel’s rim. You can lock one of the levers by taking the hooked side of the lever and attach it to one of the spokes on the wheel. Then, take the other lever and sweep it under the bead of the tire, pushing the bead out towards you.
Once the outer bead of the tire is off, pull the tire towards you to un-set the bead on the other side of the tire.
Then, gently remove the tire and tube from the wheel. Make sure to pull the valve stem through the wheel rim when removing the tube.
Once the tire and tube are off, it is usually good practice to inspect both for any wear if you are not already planning on replacing them. For the tube, get a tire pump and slowly fill it with air until it takes shape. Go around the tube with your hands checking for any soft spots, bulging, stretching, or holes. On the tire, check for any cracking, worn down spots on the side wall, flat spots on the tread, or holes in the tire itself. If any of these conditions apply to either the tube or the tire, it may be time to repair or replace them.
To replace your tire, simply push the inner bead of the tire around the rim of the wheel, letting the outer bead hang out of the wheel.
Next, grab your tube. Make sure it is fully deflated and place it into the tire. Push the valve stem up through the wheel rim and secure it by threading the lock ring on. This will help to hold the tube in place. Then tuck the rest of the tube into the inside of the tire.
Next, start from the opposite side of the valve stem and start rolling the tire onto the wheel. It’s best to roll the tire evenly along the wheel until you get back to the valve stem.
Once you get to the valve stem, the bead will get difficult to roll over the wheel. You can use one of your tire levers to help roll the bead over the rim by placing it in between the tire and rim, then pushing along the wheel. This may take a little force to get it on.
Next we can put air in the tire.
PART 2: Inflating the Tires
For this part you will need a bike pump with the appropriate attachment for the style for the valve you have. As we mentioned earlier, the valve on your tube will come in either a presta or schrader style. Many bike pumps will be able to work for both, but be sure you have the right one for your style. If you are in need of a tire pump, we have many different options for you on our website.
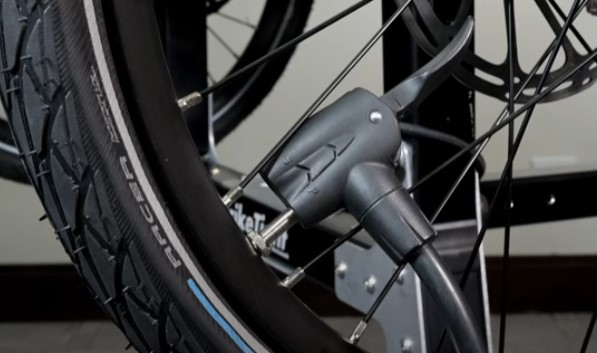
Once you’ve got your pump, place it on the valve and lock it in place with the lever on the back of the nozzle. After the nozzle is locked, you can then begin to slowly pump up the tire. As it fills with air, watch the bead of the tire and make sure it meets up neatly with the inside of the rim. Make sure the tire is seated and that there is no bulging on both sides of the wheel.
After you seat the tire properly, you can pump the tire up to its recommended pressure. All tires come labeled with their recommended pressure somewhere along their side walls. We will pump this tire up to ____ psi. Then we’re done with tires.
Next we will talk about cleaning the chain.
PART 3: Cleaning and Lubricating the Chain
Cleaning the chain is a simple process. You will need some form of chain degreaser. We have degreaser for sale on our website, or a cleaning kit with the Park tool degreaser equivalent. Today we’ll be using this White Lightning Clean Streak degreaser.
Park Tool CG-2.4 Chain Gang Cleaning Kit
The easiest way to clean the chain is to use a chain scrubbing tool. We have this one made by Park Tool on our website. As you can see, this uses a scrubber, brushes, and pads to clean the chain as you pull it through. Fill the bottom of the tool with your degreaser and then clamp it onto the chain.
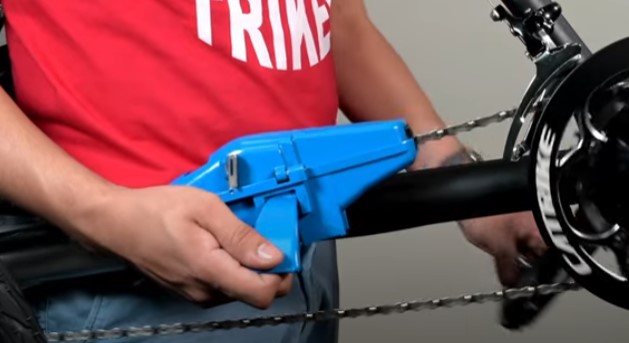
Turn the crank arms manually as you hold the tool on the chain. Allow the chain to pull itself through the tool and the tool will clean the chain for you. Once you get all of the chain cleaned, run it loosely through a clean rag to wipe off any excess degreaser.
You may also do this process with simply a rag and degreaser although it may take a little more effort to clean the chain completely. Grab a clean rag, spray down your degreaser of choice on the chain, and then run it through the soaked rag. Then with a dry part of the rag, repeat the process of drying the chain.
When you clean the chain you remove all of the necessary lubrication that allows the chain to move smoothly. You will need to replace that lubrication with your choice of chain lubricant or chain wax. We have plenty of options for you to choose from on your website. Take your lubricant of choice and squeeze the bottle into the middle of the chain as you rotate the crank. Wipe off any excess lubricant and you are good to go!
The next step is adjusting the rear derailleur.
PART 4: Adjusting the Tension on the Derailleur
If you notice that your shifting is either too sluggish or skipping gears when shifting, you may need to adjust the tension of your derailleur.
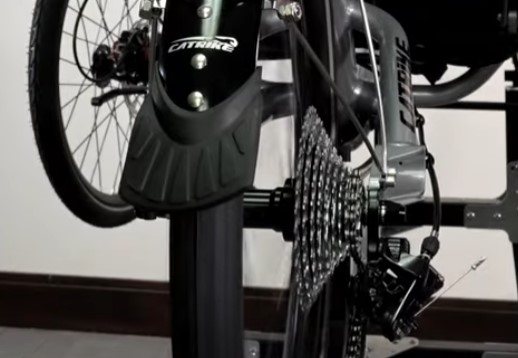
You can adjust the tension on the derailleur by turning the thumbscrew located on the shifter cable either near your derailleur or near the shifter itself. If your chain is skipping gears, you will need to loosen the tension on the derailleur until the problem stops. On the other hand, if when you shift, it feels sluggish getting into the next gear, you may need to increase the tension. Once it is properly tensioned, the gears should shift nicely and smoothly.
For our last bit of maintenance, we’ll talk about brake replacement and adjustment.
PART 5: Brake Replacement and Adjustment
To start with the brakes, we will remove the brake caliper and IS mount to inspect the condition of the brake pads.
Taking a look inside of the brake caliper, we check how much life is left in the pad. When your pads reach the end of their life, they will be completely flat. To replace the pads, start by opening the caliper completely using the adjustment dials on either side of the caliper.
Pull the brake pads out by either pulling on the tabs on the bottom or, using a small screwdriver or pick, push them out from the top. They should slide right out of the caliper.
As you can see, the brake pads have a ‘left’ and a ‘right’ brake pad as noted by the small ‘L’ and ‘R’ etched on the back of the pad. They both have a smaller set of ears that will reinforce the pads in the caliper. To install them, place the clip onto one of the brake pads and line up the bridge of the clip in the middle of the smaller set of ears. Make sure the prongs on the clip are on the outside of the contact patch of the brake pad. Then sandwich the clip with the other brake pad, again making sure to place the bridge in between the ears. Finally, insert the pads with the bridge of the clip lining up with the hole at the top of the brake caliper. Note that the ‘right’ brake pad should be on the side facing the wheel. Push the pads in until they click into place.
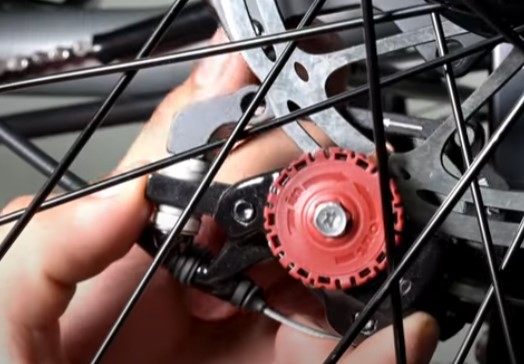
Finally we can reinstall the brake caliper and IS mount. Once the caliper is mounted back on the trike, we can adjust the clearance of the pads to the brake rotor. We want to bring the brake pads as close to the rotor as possible without them rubbing. To do this, adjust the dials on either side of the caliper until the pad contacts the rotor. Then reverse the adjustment by a couple of clicks at a time until the pad no longer makes any sound when you spin the wheel.
Once the pads are spaced out enough, you can adjust the feel of the brakes by tightening the thumbscrew for the brake cables similar to how we adjusted the derailleur.
I hope this article has helped you learn the basics of maintaining the equipment of your trike. All of the tools and materials can be found on our website or linked in this article.
If you prefer to have this and more done for you. Just give us a call or send us an email to schedule an appointment with our Service Department. We have Basic and Premium tune up options available.
If you have any questions, contact us anytime and we will get back to you as soon as we can. In the meantime, Relax. Spin Fast. Ride Trikes!