


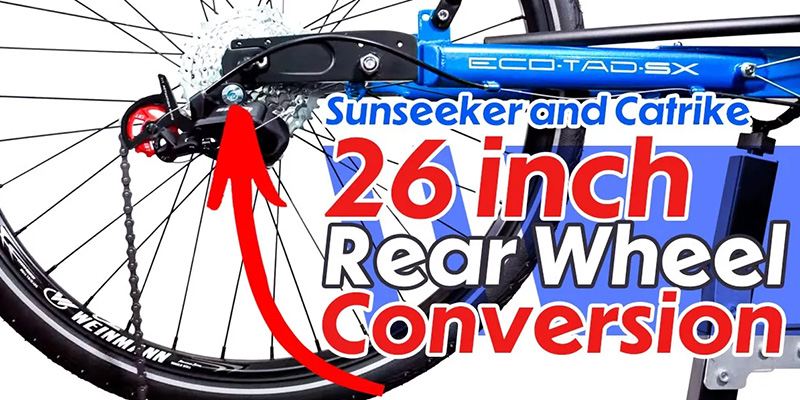
Sunseeker Larger Rear Wheel Conversion
Published on 03/04/2024
Hello Everyone, welcome back to another Utah Trikes article. Today we're going to show you how to convert the rear wheel on your Eco Tad to a 26 in wheel using our UTCustom Extension Plates. This process will be slightly different but simpler if you are installing this kit on a Fat Tad CXS or a Catrike. We also have a video version of this tutorial linked at the bottom of this page. So let’s get started!
To start, we will need to remove the rear wheel. If you need help with removing the wheel check out the video we have about it.
Part 1: Removal of Shifting Components
1. Remove cable and housing.
2. Uninstall the rear derailleur.
3. Uninstall the grip, shifter, and cable.
As part of extending the rear fork, we will need to extend the shifter cable for the derailleur to account for the extra length. We will start by clipping the end off of the shifter cable. Then, we loosen the bolt that holds the cable in and pull the cable out of the derailleur body. We can then remove the rear cable housing on our Eco Tad.
Next we will need to remove the shifter from the handlebar. To do this we will remove the grip first. On Eco Tads there is a bolt that holds the grip to the handlebar. Once we loosen the bolt, the grip should slide right off. We can then unbolt the shifter and slide it off of the handlebar as well. Since we will be replacing the shifting cable anyways, we can remove the cable from the housing when we go to remove the shifter.
Eco Tads have a longer and shorter housing for the shifter cable. We will only have to replace the shorter of the two on this Eco Tad, but if you are doing this on a Fat Tad CXS or a Catrike model you will need to replace the entire length of the housing.
Finally, find the master link in the chain and, using your chain link pliers, break the chain. Then unbolt the derailleur from the hanger on the frame.
Part 2: Installing the Extension Plates
1. Identify the correct orientation
2. Bolt plates in place using correct hardware
3. Install the derailleur hanger
The UTCustom Wheel Extension Kit comes with a right and left extension plate, a derailleur hanger, hardware for the derailleur hanger, 2 M10 by 20 button heads, 2 M10 lock nuts, and 4 standard M5 by 20 bolts.
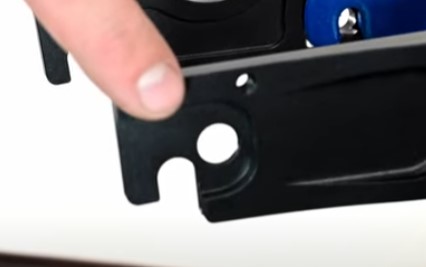
The extension plates are cut in a way that only allows them to go one way. The right side extension plate will have a cut out for the old derailleur hanger while the left side will have a brake mount integrated onto the top of it.
To bolt on the plates, we will place the button head bolt through the hole in the original drop out from the inside of the fork and thread on a lock nut on the other side. Because these are nylon locking nuts, you will not need to use any thread locker. We can then repeat this process on the other side.
Next, we will install the derailleur hanger. The derailleur hanger comes with its own hardware, one with a notch for a flat head screwdriver and the other with an insert for an allen key.
First, we will place the derailleur hanger in the cut out slot. Then, place the notched insert through the hole on the inside of the extension plate. While holding the notched side in the hole, place the allen key side in and tighten it down.
Part 3: Installing the new drivetrain
1. Install the new cassette
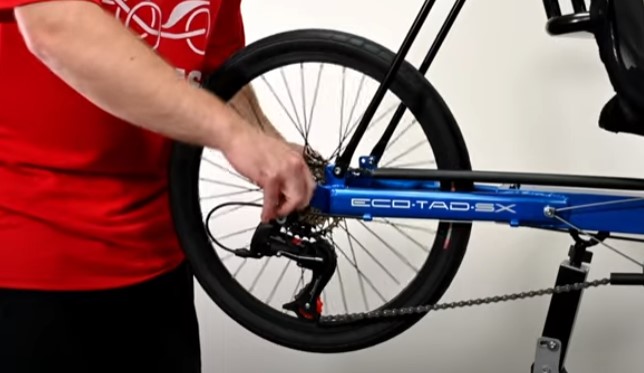
2. Place wheel into the dropout
3. Install the new rear derailleur, shifter, and cable
4. Adjust the chain length
The next thing is to install the cassette onto the new wheel. On the Eco Tads we swap out the stock 7-speed for an 8-speed cassette when we put on a bigger wheel to keep the free wheel function of the Eco Tad. To install the cassette take the gears that you have and slide them along the splines on the wheel. The gears should be in order of biggest to smallest where the biggest is closest to the wheel. Slot in the extra gears to your cassette. Then take your lock ring and thread it into the hub.
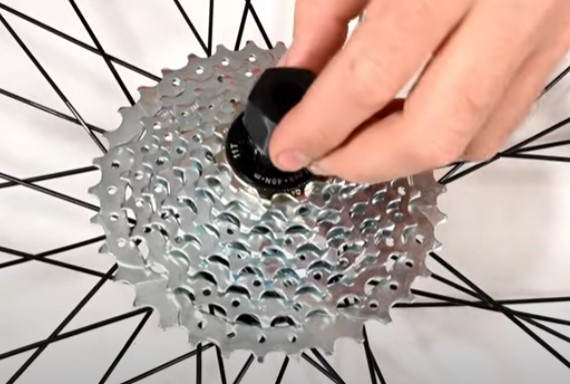
Using the correct cassette tool for your cassette, which can be found on our website, tighten the lock ring by placing the tool into the ring and tighten it with a wrench until it is snug.
Now, using the old quick release skewer, place the wheel into the new drop out and lock it down.
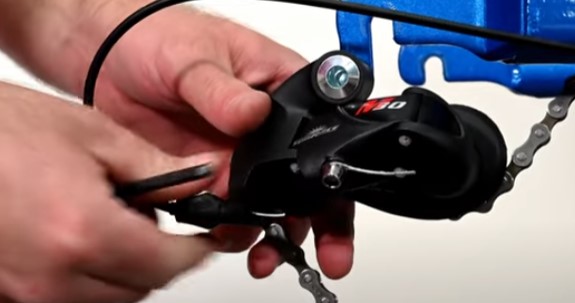
Now we will install the new derailleur. We want to make sure that the angle adjustment screw on the back side of the derailleur goes on the inside of the small notch on the end of the derailleur hanger. Then, we can screw the derailleur down using the bolt that came with your new derailleur.
We can now install the new 8-speed shifter and cable. When you purchase a new shifter it should come with a new cable installed already. Simply slide on the grip shifter and tighten the set screw. You can now reinstall the grip and tighten its set screw as well.
If you are doing this process on a Fat Tad CXS, Catrike, or are using a different shifting system, you will only need to replace the shifter cable with a longer one. If you need assistance with replacing the cable on your specific system email us at our support email and we can guide you through it.

For the next part of the process we will need a shifter cable kit which can be found on our website. The kit comes with a length of shifter cable, a length of shifter cable housing, 2 ferrules, and a crimp end for your cable.
Now we will need to measure up a new length of cable housing. Place the end of the housing at the start of where you need it and then run it all the way to the derailleur. Leave a little extra length so that the derailleur has some slack to be able to move.
Once you’ve cut your housing to proper length, place the ferrules on the ends of the housing to prevent them from fraying.
Now that we have the new cable housing made, we can feed the shifter cable through the entire length of the housing. Make sure the beginning end of the cable housing gets tucked into the shifter. On the Eco Tad, we will feed the cable through the shorter housing and take the end of the housing and tuck it into its place on the frame. We can then run the other side into the derailleur.
Run the rest of the cable through your derailleur and clamp it down using “L” shaped plate and allen bolt. There will be a notch in the plate that the cable will run through.

Take the rest of the cable on the end, leaving about a 4 finger length for adjustment and cut the end off. Then, to prevent the cable from fraying, clamp the end of the cable.
We can now extend and reinstall the chain through the derailleur. If you need help with this process, check out our video on readjusting your chain linked above.
At this point you will adjust your rear derailleur and shifting and then you are done!
I hope this article has helped you learn how to install your very own extension plates and 26 inch rear wheel. If you are trying to achieve the UTCustom “Annihilator” look, you will need to acquire and install a pair of 24 inch wheels on the front. If you need assistance with that check our wheel tutorials linked in this playlist.
If you have any questions or concerns, feel free to reach out and email our support team and they will get back to you as soon as they can.
In the meantime, Relax. Spin Fast. Ride Trikes!