


How to Install Tannus Armour on a Recumbent Trike
Published on 02/19/2024
Hello Everyone, welcome back to another Utah Trikes article. In todays article we're going to show you how to Install Tannus Armour for your tires. We will also have a video version of this article linked at the bottom of the page.
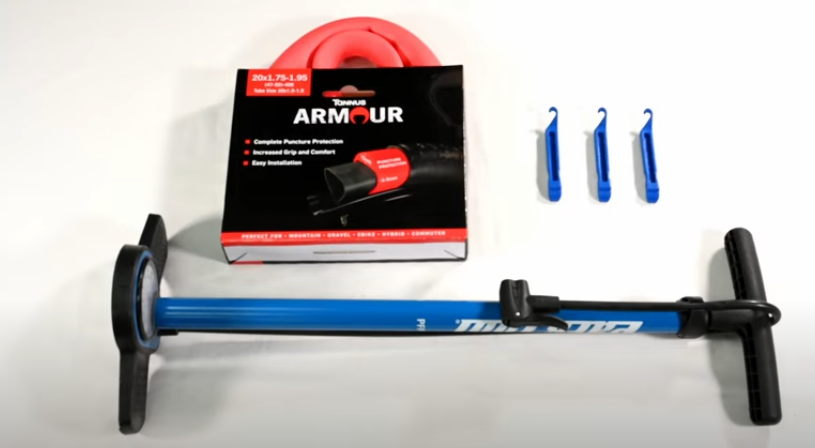
What you need
The tools you will need today are some tire levers, a pump, and the Tannus Armour for your tires. One thing to note is that there are different Armor sizes for different tires. You can find the size of your tire and tube located on the side of your tire.
Part 1: Tire Removal and Preparation
For this article you can remove your wheel for easier access, for more information on how to remove your wheel you can click the link here for help. Be careful with the rotor as you flip the wheel back and forth.
For reference,There are 2 types of air valves on a tire, a Presta and a Schrader valve. The steps to remove air from the different valves vary slightly. If you have a Presta valve just unlock the valve and press down on the top until the tire is empty. If you have a Shrader valve you will need to press the release with one of the tire levers. Today we will be using a tire with a Presta Valve.
After you remove your tire from the trike. The second step will be to remove the cap and ring off of your valve stem to empty the air from your tire.
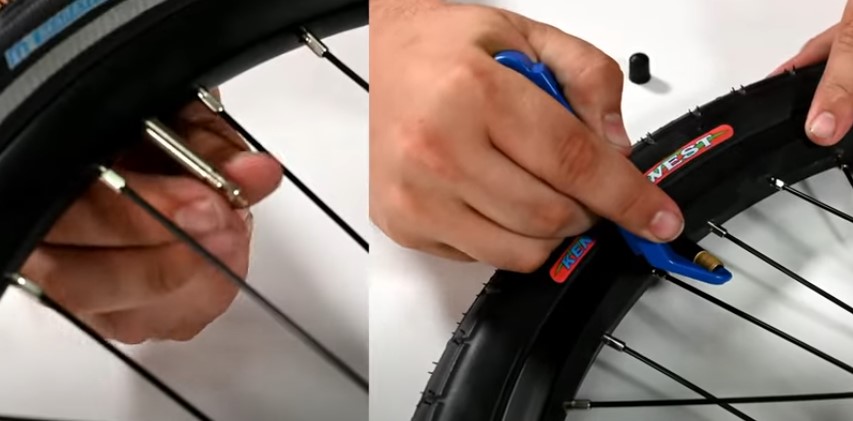
Once the tube has deflated, grab your tire levers and place both underneath the bead of the tire. The curved side of the lever should go under the bead and the flat edge should butt up against the wheel’s rim. You can lock one of the levers by taking the hooked side of the lever and attach it to one of the spokes on the wheel. Then, take the other lever and sweep it under the bead of the tire, pushing the bead out towards you.
Part 2: Installation
To prepare the tannus armor to be installed, remove it from the box. Begin to stretch it out into shape. To do this, flip the lip inside out, loosening it up, and return it to its original orientation.
On the tannus there are usually adjustment cut lines.
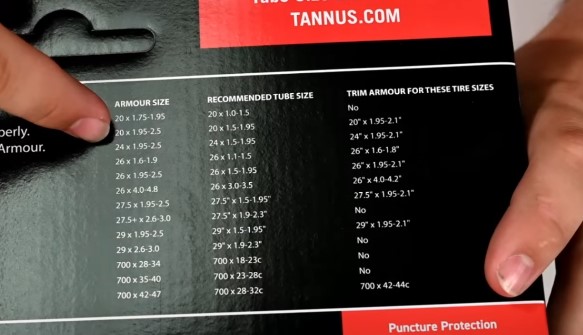
Depending on the tire size, you will need to adjust the armor by cutting it to size. There is a size guide on the back of the box to help measure the cut. For the tire we have today we will not need to adjust it.
After determining the proper size of the armor, insert the Tannus Armor into the inside of the tire. It may appear oversized, but will fit uniformly inside the rim later.
After installing the armor into the tire, we can insert the wheel rim. This is best achieved by tucking in the rim, then from one side we can tuck in the armor and tire bead completely.
if you put the valve hole in the rim matched up to the markings on the tire, you will be able to find it easier to identify where the valve is on the wheel.
As we flip the wheel over to the untucked side we go from the inside of the tire to push the armor into place. You may hear it pop into place.
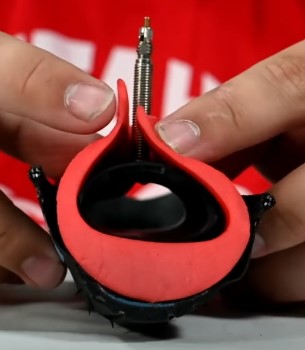
When Tannus armor is installed properly, it will look like the tube is being cradled by the armor and the tire supporting the armor.
Finally, take the tube to reinstall it. Allow your tube to have a little air to allow it to fill in smoothly. If you have a fat tire, do not fill the tube with any air. Find the hole in the rim and insert the valve through. Then tuck in the tube. Please take your time to tuck in the tube, to avoid pinching your fingers or damaging your tube.
After the tube is fully in place, it is a good time to tuck in the overhang flaps of the armor into the rim around the tube.
Part 3: Finishing up
Lastly we just need to put the tire back on the rim. You will want to start at the edge with the air valve. It will be a lot easier this way. Start pushing in the bead of the tire into the rim by hand.
When you get to the last quarter of the tire, you may want to use a tire lever to help push in the bead.
Everytime you finish tucking a portion in with the tool make sure to remove the tool sideways to avoid damage to the tool or part of the tire.
To finish, put the ring back on your presta valve and then fill the tire up. This tire's capacity is 55-80 psi, we will aim for about 60. Lastly, give it a few taps on the table to make sure it's secure and that no armor pieces are going to peek through.
At last your tire is ready to be reinstalled!
We hope this article was able to assist you in installing your Tannus Tire Armour. They are a great resource of extra protection for your tubes.
If you have any questions, contact us anytime and we will get back to you as soon as we can. In the meantime, Relax, Spin Fast, Ride Trikes.