


Upgrade your chainring for more speed
Ashley Guy - Published on 07/12/2007
Since posting my Ultimate Gear Modifications article, I've received several emails and calls regarding the most affordable option I mentioned, which is to simply change out the front sprocket to a bigger size. If you've never messed with your front chainrings or derailleurs before, you might be hesitant to take apart your trike's front end. Well, it's a pretty simple operation so let's get to it.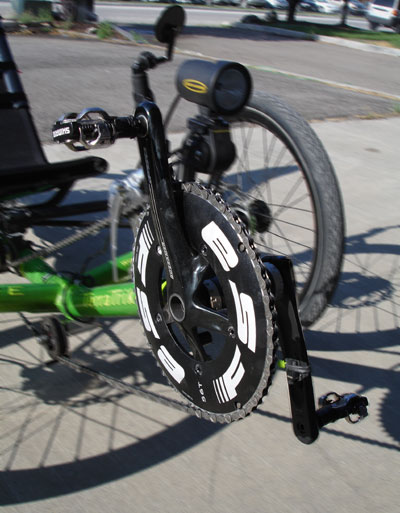 First, while I have had success getting the Sora and Tiagra derailleurs to work with a larger chainring, they are only rated for chainrings up to 52 teeth. So, be aware that if you go all the way to a 56T chainring, you may have some difficulty getting it to always shift smoothly between your 2nd and new 3rd gears. Some of this difficulty can be overcome by changing your middle chainring to a slightly bigger size as well. The front derailleur best suited for a 56T chainring is the Ultegra, which is the stock hardware on the WizWheelz Race and Edge TerraTrikes.
Before we begin, you need to obtain a bigger chainring. You might not want to go all the way to 56T, but that will give you the highest top-end. The first place to look is your local bike shop if you already have a relationship with them. They may have one in stock, and may even have some different sizes in stock. The likelihood, however, is that you may need to turn to the internet to find one. Just do a Google search for "56T chainring" and you'll find some. You may even want to try Ebay. Make sure you get one with a standard 5-bolt pattern.
Once you have your new chainring ready to go, we'll start by removing the old chainring. I find it is easier if you start by getting the chain on the smallest chainring so it will be out of the way. The large chainring is held to the crankarm by five torx bolts. A good bike multitool should have the appropriate torx wrench. As you loosen the Torx bolts you may notice that the back part (nut) will start to spin. If this happens you typically can hold them in place by just pressing on the back with your index finger while you turn the torx head. Now that you have all the torx bolts off you can slide the chainring off the crankarm by pulling it up and over the pedal.
Awesome, we are now ready to slide on the new chainring. You'll notice on your new chainring that there is a pin located between two of the boltholes. This pin should be positioned to sit under the crankarm. Once you have the chainring slid over the crank arm line up the boltholes and get all the torx bolts started. I recommend tightening the bolts by starting at the bolt across from the crank arm and then moving clockwise tightening every other bolt until you've gone around and tightened all the bolts. Make sure the bolts are tight. If you have a torque wrench use the setting that is labeled on the bolts or chainring.
Now that the chainring is installed you'll need to realign the derailleur. You'll need to move the derailleur higher on the post so it will clear the larger chainring. Use an allen wrench to loosen the derailleur clamp and pull the derailleur up. The derailleur should clear the chainring by about 2mm. When you tighten it make sure that the derailleur cage is parallel to the chainrings. Once the derailleur has been clamped down you will need to loosen the cable so it will shift properly. Make sure your shifter is positioned to 1st gear the loosest position) and then loosen the allen bolt holding the cable. Let the derailleur cage move freely towards the post while the cable slides through the clamp and then tighten the cable bolt.
Most likely, you will need to adjust the derailleur so that it will shift through all the gears. Start by adjusting the 1st gear setting. The screw closest to the post will control how far the cage comes in when the cable is at its loosest position. Turning the screw counter clockwise will cause the cage to move towards the post, turning it clockwise will move the cage away from the post. After you've adjusted the first gear position have someone hold the back tire off the ground or use a trainer so you can turn the pedals. While you turn the pedals crank the front shifter to the highest gear position. Adjust the 3rd gear position by turning the adjustment screw furthest away from the post. To move the cage away from the post turn the screw counter clockwise, or turn the screw clockwise to move the cage in. Make sure that the cage does not hit the chainring and stays parallel to the rings as it moves through the gears. If not you will need to readjust the derailleur on the post.
Now that you've got your new chainring installed take your trike for a ride and enjoy the speed!