


UTCustom Revolution Headset Install
Published on 04/08/2024
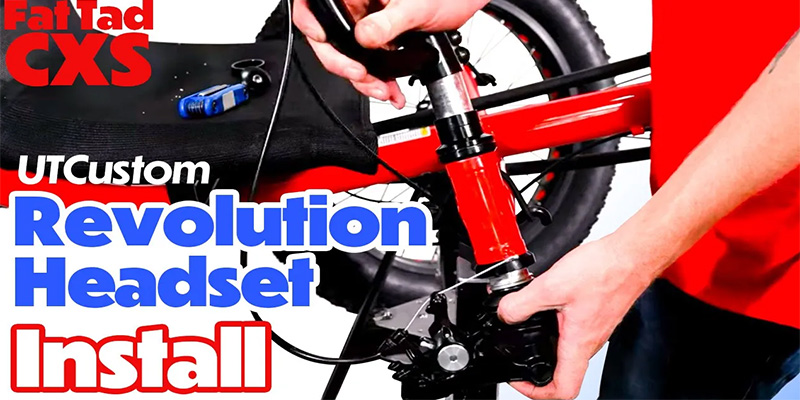
Hello and welcome back to another Utah Trikes article. Today we're going to show you how to remove your headsets and install our UTCustom Revolution Headsets. This headset is an upgrade for Sunseeker tadpoles and comes stock on the NAWC Rigs and the Revolution eQuads. They take less to maintain and last longer than the stock headsets. We also have a video on this subject linked at the bottom of this page. So let’s get started!
Tools Needed
Bearing Cup Press
Headset Remover Tool
Hammer
PART1: Replacing the Stock Headset
First, we will need to remove everything connected to the head tube. If you need help with this process we go over it in our Ackerman Compensator video.
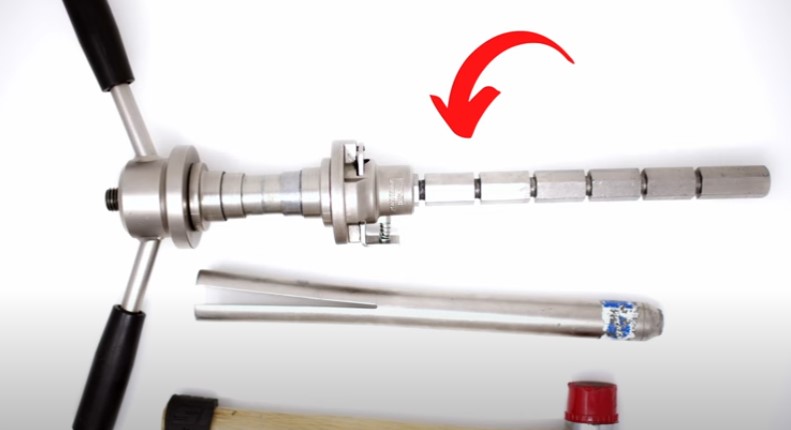
For this process we are going to need a bearing cup press, which we sell on our website, a Headset remover tool which you can find on Park Tool’s website, and a hammer.
Once the spindle and bearings have been removed, we can then punch out the bearing cups using our Headset Removal tool. You will just push the solid end of the tool through the head tube until the forked end clicks in place. Then we’ll use our hammer to tap the bearing cup out. We’ll then do the same for the opposite cup.
Now we are ready for the new headset.
Part 2: Headset Installation
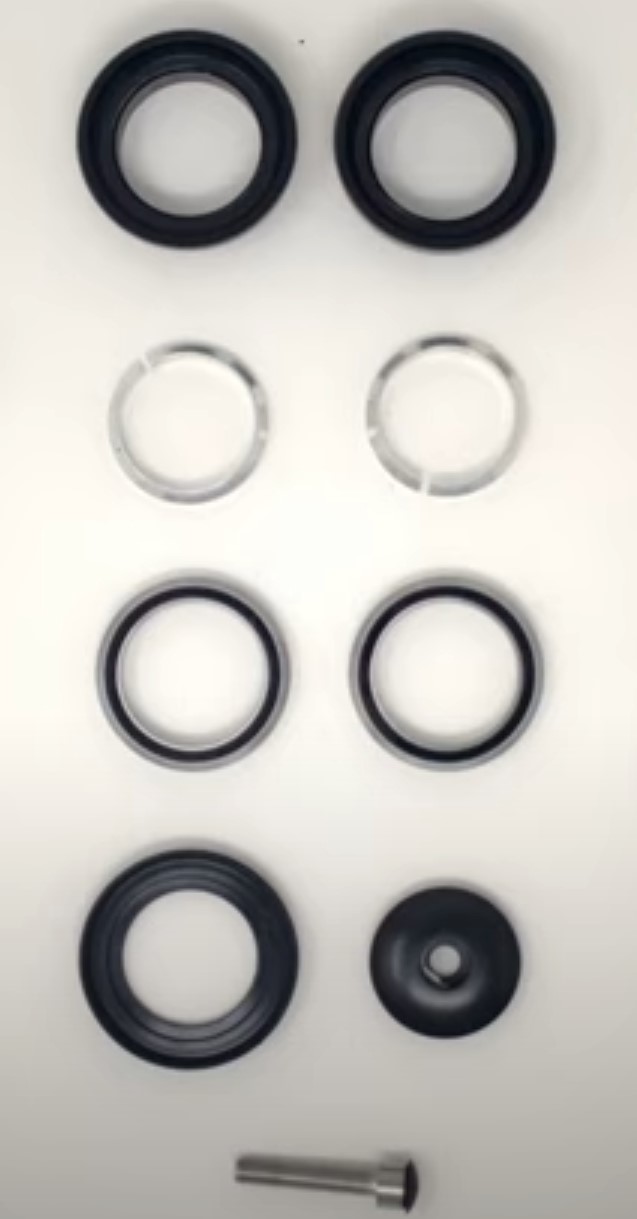
The UTCustom Revolution Headset comes with a top and bottom bearing cup, a set of races, a set of bearings, a dust cover, a top cap, and a bolt.
Before we press in the new bearing caps we will want to make sure that we place a thin layer of grease on the inside of the head tube. This will make pressing the cups a little easier.
Now we’ll want to have the bearing cups correctly orientated. The two new caps are different sizes. The one with the smaller lip will go on the top and the one with the larger lip will go on the bottom.
We will then grab our Bearing Cup Press and push the release button to remove the bottom and pull it off along with the bottom stepped cone. Next we’ll place the top bearing cup onto the tool and slide the tool through the head tube. Then we’ll slide the bottom bearing cup, stepped cone, and bottom press onto the tool.
Now we can snug up the tool to the head tube. We will want to make sure that the bearing cups go in as straight as possible when we press them down. Next we can tighten the tool down. As a tip, you can use a wrench on the bottom of the tool to prevent the whole assembly from spinning.
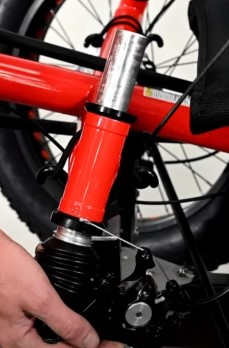
Once the bearing cups are pressed in, we can loosen and remove the tool. Now with the spindle bare, we can install the new race and sealed bearing. Then we can place the spindle through the head tube and place our second bearing and race. We will follow it up with the new dust cap, any spacers that were previously on the trike and the handlebar. Finally, we bolt down the new top cap.
We’ll then reinstall everything and tighten it down.
We hope this article has helped you install new UTCustom Revolution Headsets on your own trike. Check out our other trike tutorials to help you further upgrade and customize your trike.
As always, if you have any questions or concerns you can contact our support team through email or by phone and they will be happy to get back to you when they can.
In the meantime, Relax. Spin Fast. Ride Trikes.
UtahTrikes.com is a wholly owned subsidiary of Guy Graphics, Inc.
Copyright © 2006-2024 All Rights Reserved.
Materials on this site may not be used without express written permission.