


Crankset Removal Tutorial for Recumbent Trikes
Published on 04/15/2024
Hello and welcome back to another Utah Trikes article. Today we're going to show you how to disassemble and reassemble your crankset. We’ll go through your standard Catrike and Sunseeker model cranksets in this article. We will also have a video linked at the bottom of this page. So let’s get started!
Tools Needed
a bottom bracket wrench
Bottom Bracket Remover (Catrike)
Bottom Bracket Tool (Sunseeker)
an 8mm allen wrench
a pedal wrench
bottom bracket socket
a tapered-style crank puller
PART1: Catrike Crankset Removal
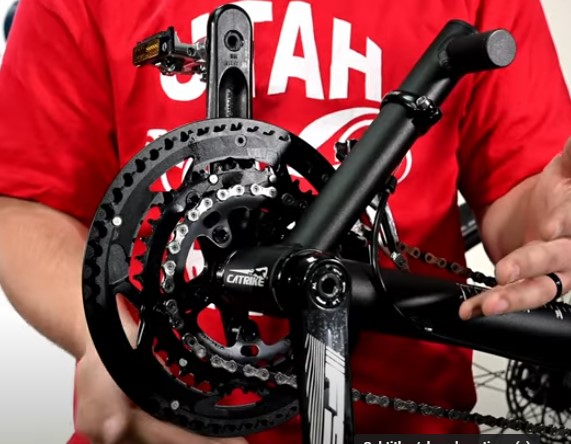
We will first start with a catrike crankset. The tools we will need for this process will be a bottom bracket wrench meant for catrikes specifically, an 8mm allen wrench, and a pedal wrench.
To start, this process will be easier if we break the chain and move it aside for now. We will also want to remove our pedals by taking our pedal wrench and turn the inside of the pedal to loosen. One will spin counterclockwise and the other will spin clockwise.
We can then take our 8mm allen wrench and loosen the allen key on the crank arm. As we loosen it, the crank arm will pull itself off of the axle. Make sure when you pull off the arm that you keep track of the two washers sandwiched between the arm and the boom. You will have one nylon washer and one ‘wiggle’ washer.
Now we can remove the crankset from the boom and place it aside. We then will take our bottom bracket wrench and loosen both sides of the bracket. One will spin counterclockwise and the other will spin clockwise to loosen. Once both are loosened, we’ll spin them in the same direction to remove both of them at once. We have now completely disassembled the crankset.
To reinstall the crankset, you will just reverse these steps
PART 2: Sunseeker Crankset Removal
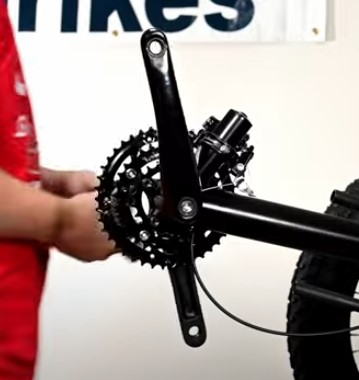
We will next demonstrate a Sunseeker crankset. The tools we will need for this process will be a bottom bracket socket, an 8mm allen wrench, a tapered-style crank puller, and a pedal wrench.
Similar to the beginning of the process of the Catrike crank, we will break the chain and move it aside for now. We will also remove the pedals to make it easier.
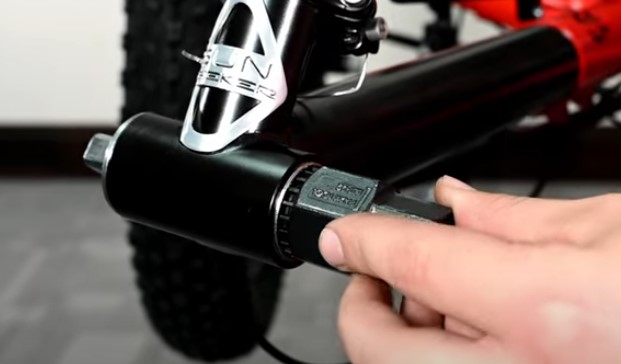
Next, we’ll remove the bolt holding the crank arm with our 8mm allen wrench. We can then take our crank arm puller and thread the outer collar into the crank arm. Then, once the collar is snug, we’ll tighten the wrench to push the crank arm out and remove it.
We’ll then repeat the same process on the other side and remove the crankset.
Once both arms have been removed, we can take our bottom bracket tool and slot it into the bracket. We will then loosen both sides of the bracket and then spin both sides in the same direction by hand. Then we can remove the bracket and now we have it completely disassembled.
I hope this video has helped you disassemble the crankset on your trike. If you are looking for options to upgrade your front gearing, we have plenty to choose from on our website.
If you have any questions or concerns, feel free to contact our support team through email or call us and we will be happy to get back to you as soon as we can.
In the meantime, Relax. Spin Fast . Ride Trikes.
UtahTrikes.com is a wholly owned subsidiary of Guy Graphics, Inc.
Copyright © 2006-2024 All Rights Reserved.
Materials on this site may not be used without express written permission.